[m2e-android]
Android for Maven EclipseGetting Started
The Android for Maven Eclipse connector is an Maven Eclipse (m2e) plug-in that adds maven support for the Android Developer Tools (ADT) and the Andmore Project. It brings the power of Maven dependency management into the ADT.
1. Before you start
You will need Eclipse Indigo or Juno installed.
2. Install Android Connector
You can install the Android Connector for Maven via the Eclipse Marketplace. Select Help -> Eclipse Marketplace... and search for "android m2e".
Click the Install button next to the Android Connector for Maven that appears and follow the path through the wizard dialog to install the plug-in and its dependencies (including the Android Development Toolkit and the Maven for Eclipse m2e plug-in). Accept the terms-and-conditions and click Finish.
Once you restart your Eclipse workspace you should be ready to start using the Android Connector.
3. Create Eclipse project
If you already have an Android project please make sure you have created a POM for your project using version 3.0.0 or greater of the maven-android-plugin.
Then right-click on your project and select Configure -> Convert to Maven Project.
If you are starting with a new project you can use the Maven Android archetypes to create Android projects completely within Eclipse:
- Create a new Maven Project (File -> New -> Project... then select Maven -> Maven Project).
- When prompted to Select Archetype click Add Archetype...
- In the dialog that appears enter "de.akquinet.android.archetypes" for Archetype Group Id.
- In Archetype Artifact Id enter "android-quickstart".
- In Archetype Version enter "1.0.10" and continue.
- When prompted enter your desired project group and artifact ID, version and, optionally, set the "platform" property for the Android version (defaults to '16').
- Click Finish
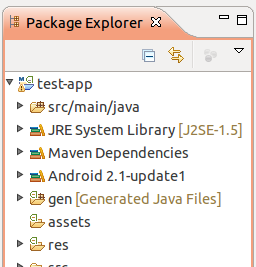
Either way you should end up with an Eclipse project looking something like this:

